
In the fall of the year, stores are full of a myriad of pumpkins ready for your fall decorations or for making pumpkin pie. There are pick your own pumpkin patches, pumpkin carving contests and contests to see how grew the biggest pumpkin. The end product you see in the store began many months before. Here is the process for how to plant & grow pumpkins with pumpkin growth stages in between. The pumpkin life cycle begins with just planting a small seed that results in those gorgeous white, green, pink and orange pumpkins you see on display.
Pumpkin Varieties
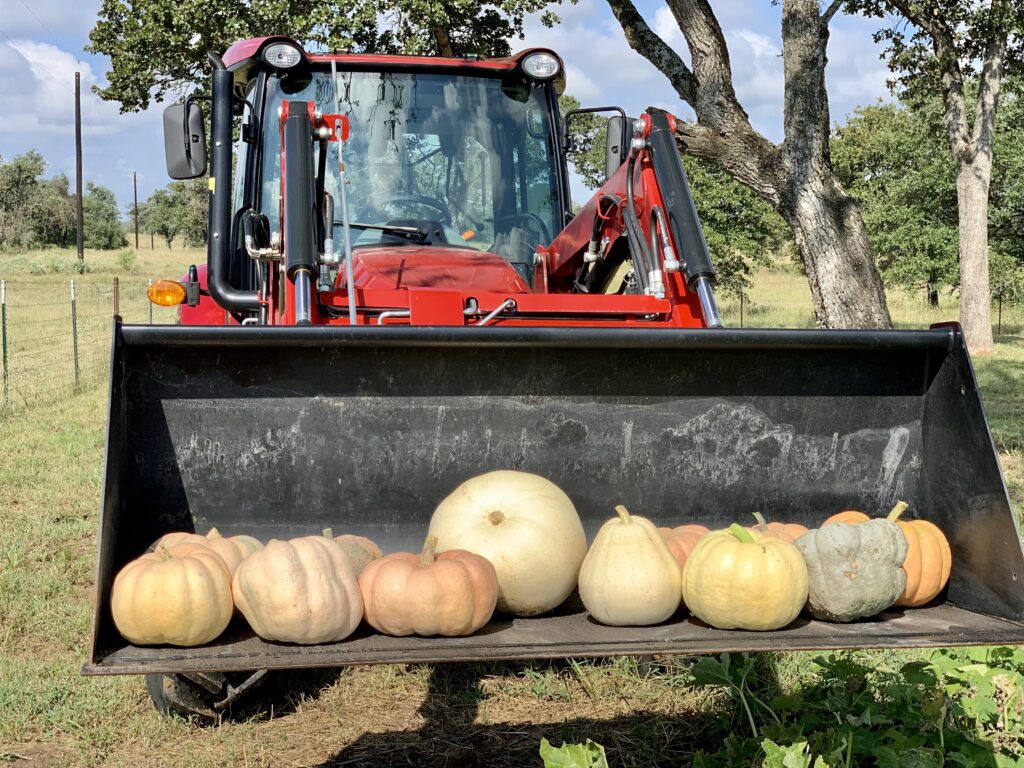
Pumpkins are available in a range of sizes and colors. Choosing just a few pumpkins to grow can be a challenge. I prefer to grow pumpkins in more of a muted color tone as compared to the bright orange jack o’lantern type pumpkins. My favorite varieties of pumpkins are as follows:
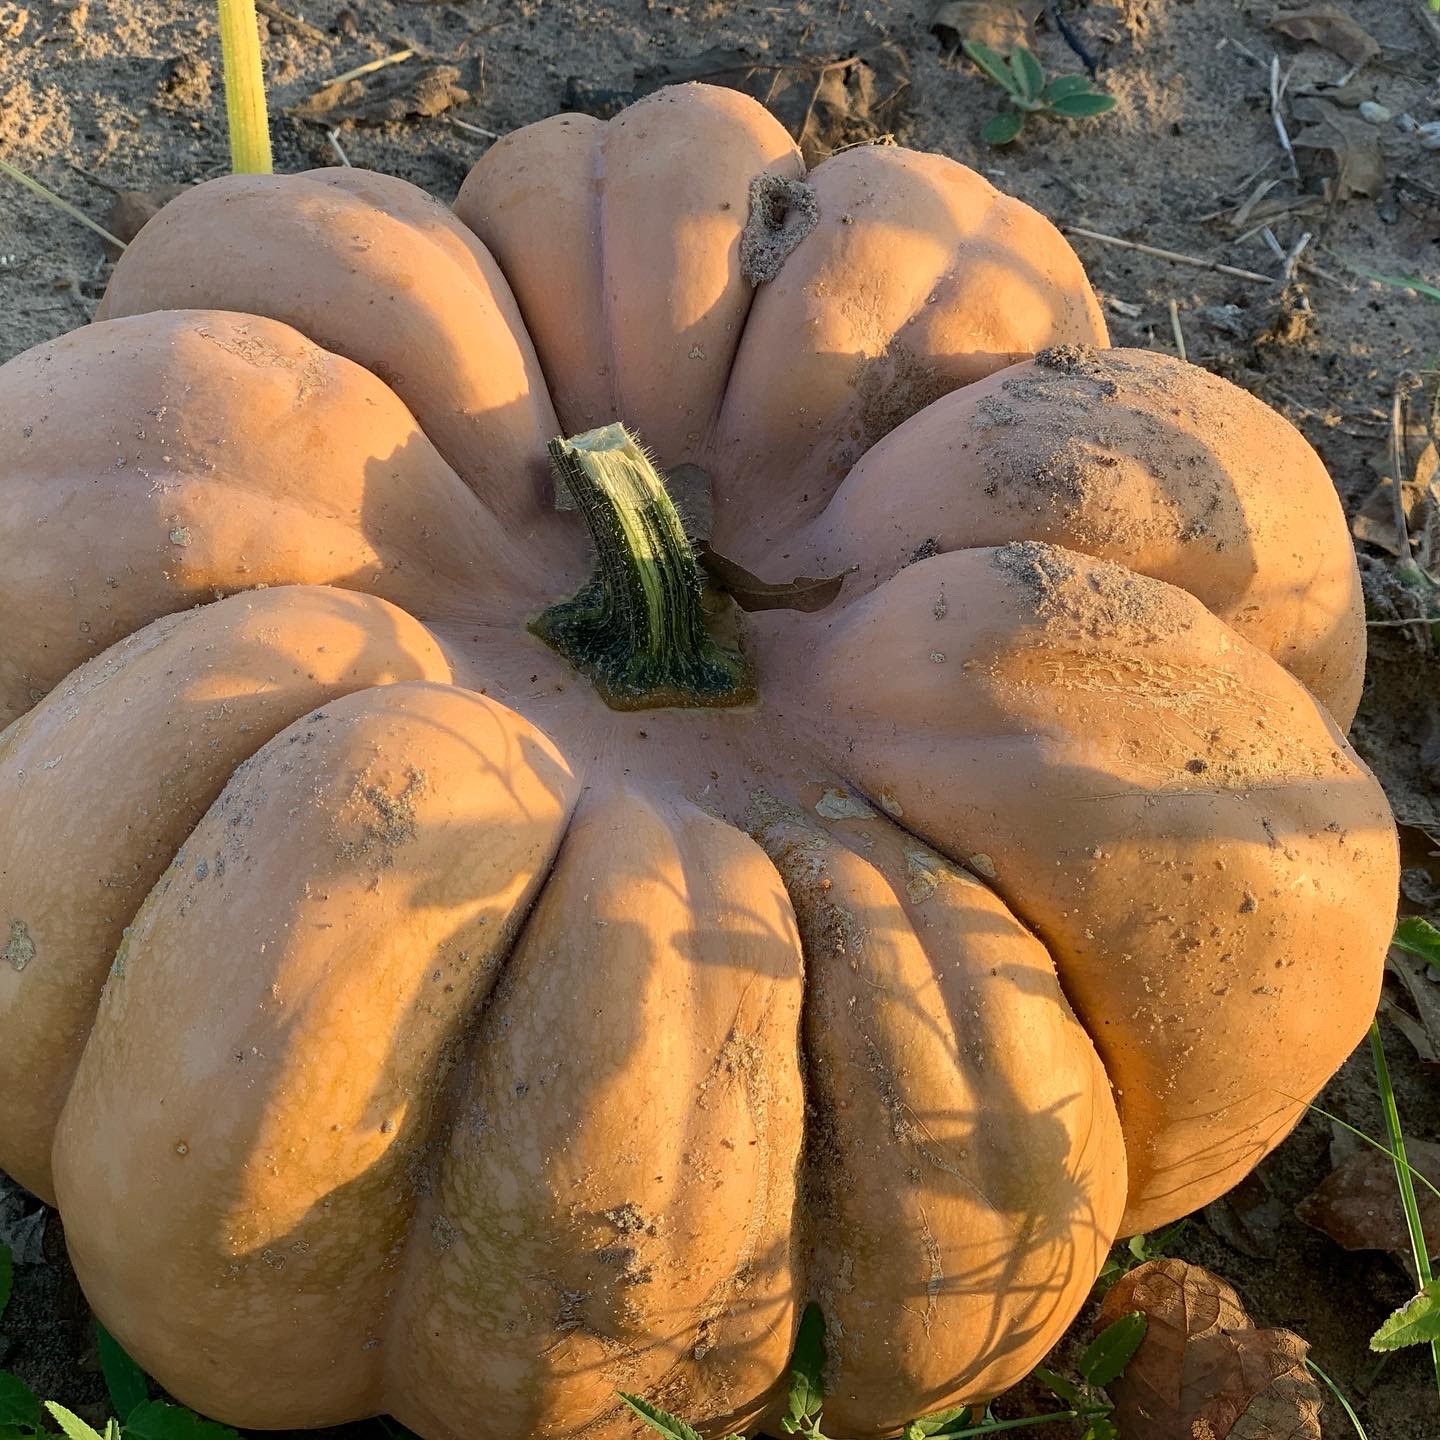
Fairytale Pumpkin – This is my all time favorite pumpkin to grow. I love the muted orange and the short squatty shape of the fairytale pumpkin. The deep ridges really give these pumpkins that classic heirloom pumpkin shape.
Porcelain Doll Pumpkin – The porcelain doll pumpkin is similar in shape to the fairytale pumpkins, but they are more pink in color. They have the deep ridges and are gorgeous addition to a fall pumpkin display.
New Moon Pumpkin – These white pumpkins are a typical rounded jack o’lantern style shape with smoother sides. New moon pumpkins are easy to carve and I love the crisp white color of the skin.
Mustang PMR Pumpkin – The mustang PMR pumpkin is a classic orange Halloween and fall color pumpkin. It produces medium size pumpkins and is disease resistant making it a great pumpkin to grow for beginner gardeners.
Blue Bayou Pumpkin – Light blue colored Blue Bayou variety pumpkins are ones I chose to grow simply because this style of pumpkin was hard to locate in our small town. I love the color and it is an unexpected but refreshing color for fall décor.
How to Plant Pumpkin Seeds
Pumpkins take 3 – 4.5 months from seed to maturity. I start my seeds in early May so that I have pumpkins in time for Halloween.
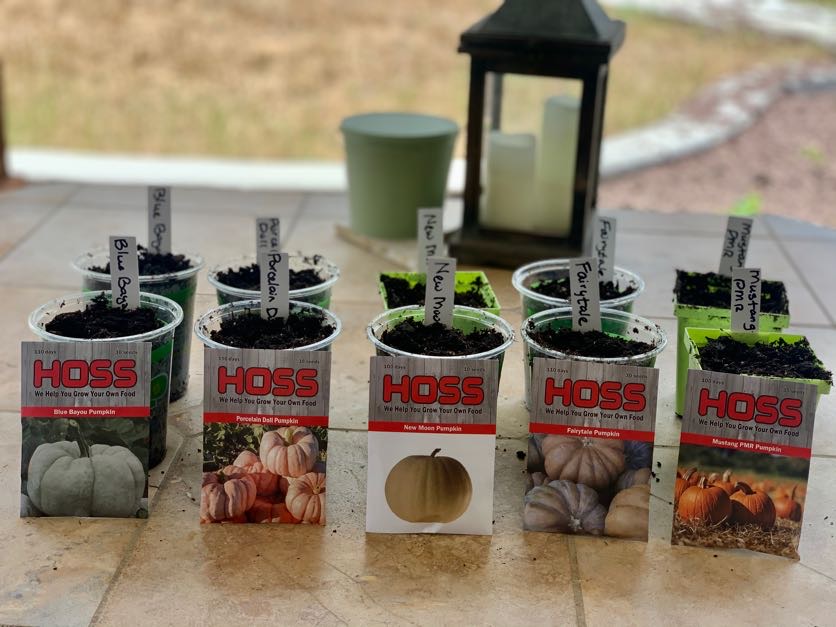
Once you decide on your favorite variety of pumpkin, I recommend starting your pumpkin seeds in small pots. Use a good quality seed starting mix, like ProMix, in your planting container. Thoroughly wet the seed starting mix and plant one to two pumpkin seeds 1″ deep with the pointy end of the seed pointing down. The ideal soil temperature for pumpkin germination is 65°F – 95°F. If your soil is below the ideal temperature. place your seed starting containers on a heat mat for better germination. The pumpkin seeds will germination in 8 – 10 days.
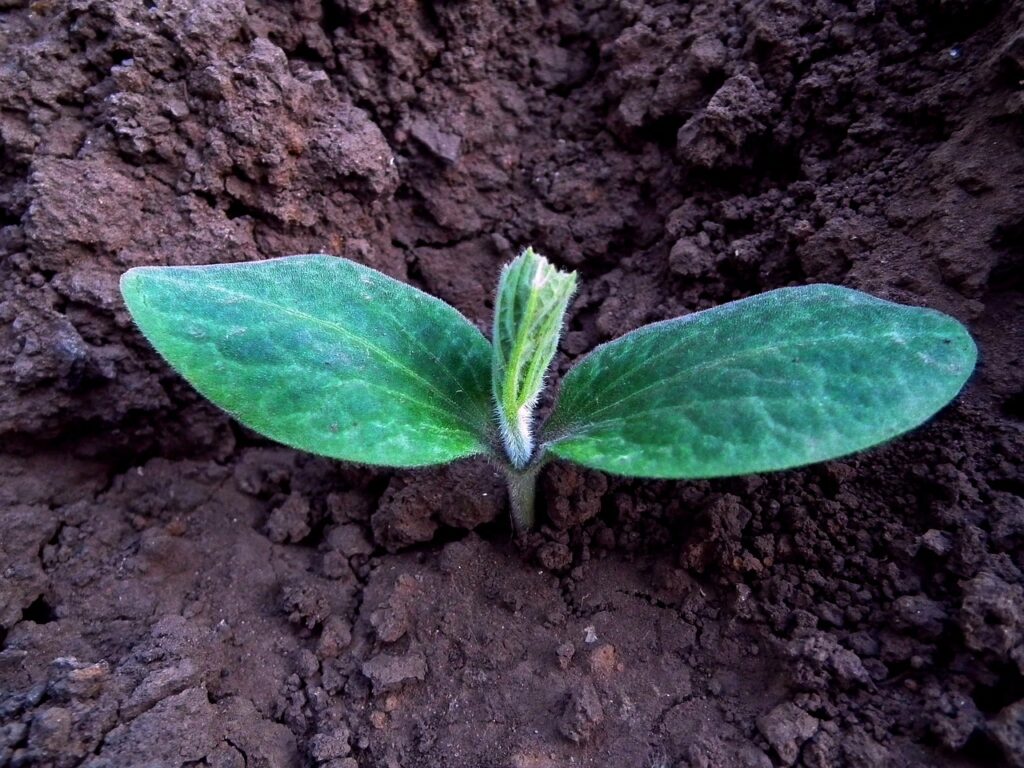
Pumpkin Growth Stages – Pumpkin Seed Germination
When the pumpkin sprouts, you will notice two green oval leaves. The green leaves are known at the cotyledon and are not the true leaves of the pumpkin seedling. The cotyledon will fed the pumpkin seedling until true leaves are formed.
Pumpkin Growth Stages – Pumpkin True Leaves
True leaves will start to grow from the center stem between the two oval leaves. These first true leaves are dark green with jagged edges and are similar to a heart shape. These are what young pumpkin plants look like. Once your pumpkin has at least 2 sets of true leaves, you may transfer the pumpkin seedling out into the garden after all danger of frost has passed.
Transplanting Pumpkin Seedlings
Pumpkins like rich, fertile well draining soil. Choose an area for your pumpkin patch that is in full sun. Sprinkle several tablespoons of worm castings into your planting hole and plant the pumpkin seedling in the ground at the same height they were growing in the container.
Pumpkins require 1 – 2 inches of water each week. Do not water your pumpkins daily; water pumpkins deeply several times a week.
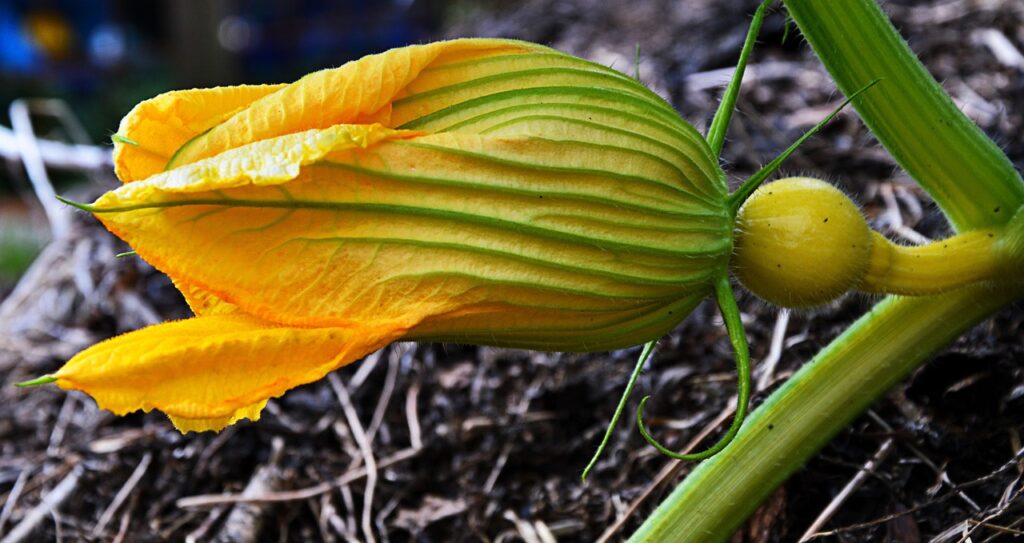
Pumpkin Growth Stages – Pumpkin Fruit Set
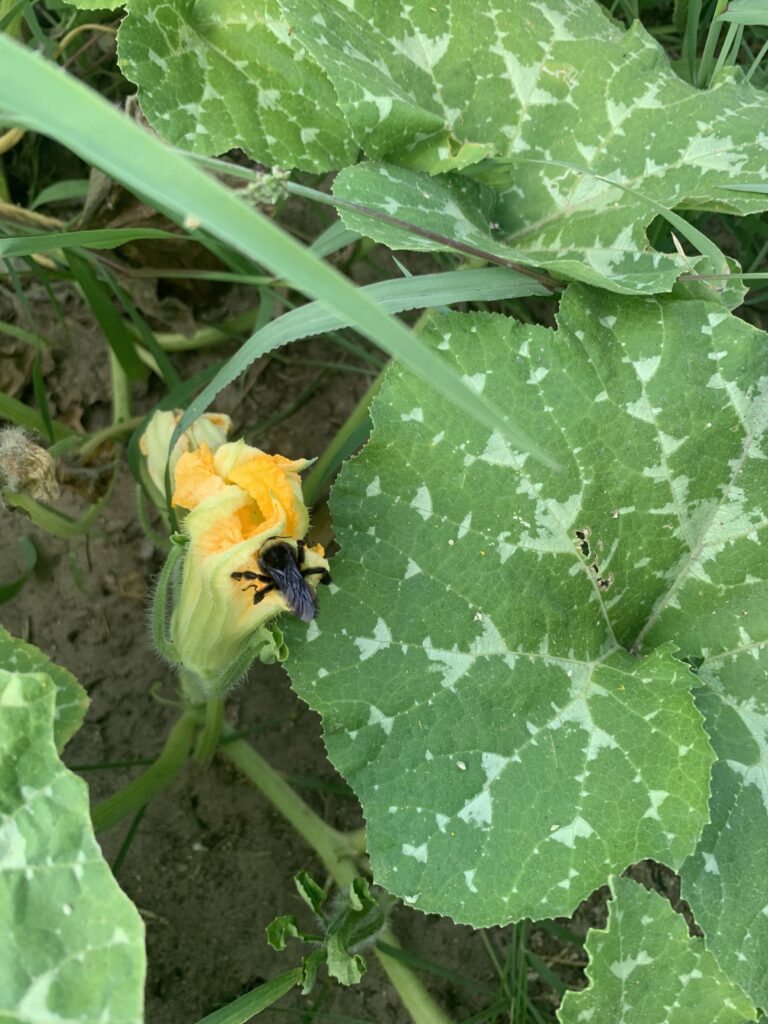
Pumpkin vines can grow rapidly with adequate nutrition and water. Orange blooms will appear on the vines. Pumpkin vines will produce both female pumpkin flowers and male pumpkin flowers on the same vine. Female blossoms will produce a small green bulb at the base of the flower. Pollinators will carry pollen from the male flowers to the female flowers to pollinate the stamen to create a viable fruit. These small green fruits will mature into pumpkins!
If you notice the small bulbs rotting at the base of the flower, it did not get pollinated. A lack of bees and insects in the garden can cause this unfortunate event. You can help nature out, by hand pollinating the flowers. Take a small paint brush and gently remove pollen from the inside of the male flower blossom. Gently brush the pollen on the stamen in the female blooms to pollinate the flower.
Best Fertilizer for Growing Pumpkins
Pumpkins are heavy feeders and require different types of fertilizers during different pumpkin growth stages. During the initial growth stages apply a fertilizer weekly that is either a balanced fertilizer, meaning there are equal amounts of nitrogen, phosphorous and potassium to promote plant growth or a fertilizer that is heavier weighted toward nitrogen. When flowers first begin to appear, fertilize pumpkins weekly with a fertilizer that is higher in phosphorous to promote flowering. Once pumpkins appear, you will want to to use a fertilizer that is richer in potassium to promote healthy fruits. Use the fertilizer in moderation, especially after pumpkins appear. Too much fertilizer can cause the pumpkins to grow too quickly and explode and split. Too much nitrogen fertilizer can burn the pumpkin plant leaves. If you are new to gardening a balanced fertilizer that is 5-10-5 will be sufficient to use throughout the entire pumpkin life cycle.
Pumpkin Vines
Pumpkin vines can grow up to 6′ per day and can easily take over your garden. Secondary vines will grow off the main vine and create a very bushy plant. If the long vines because too invasive you may prune the vines to keep them contained in your garden area. The pumpkin fruits need sunlight to ripen and mature. You may find you need to prune some of the secondary vines so that the fruits are not completely shaded.
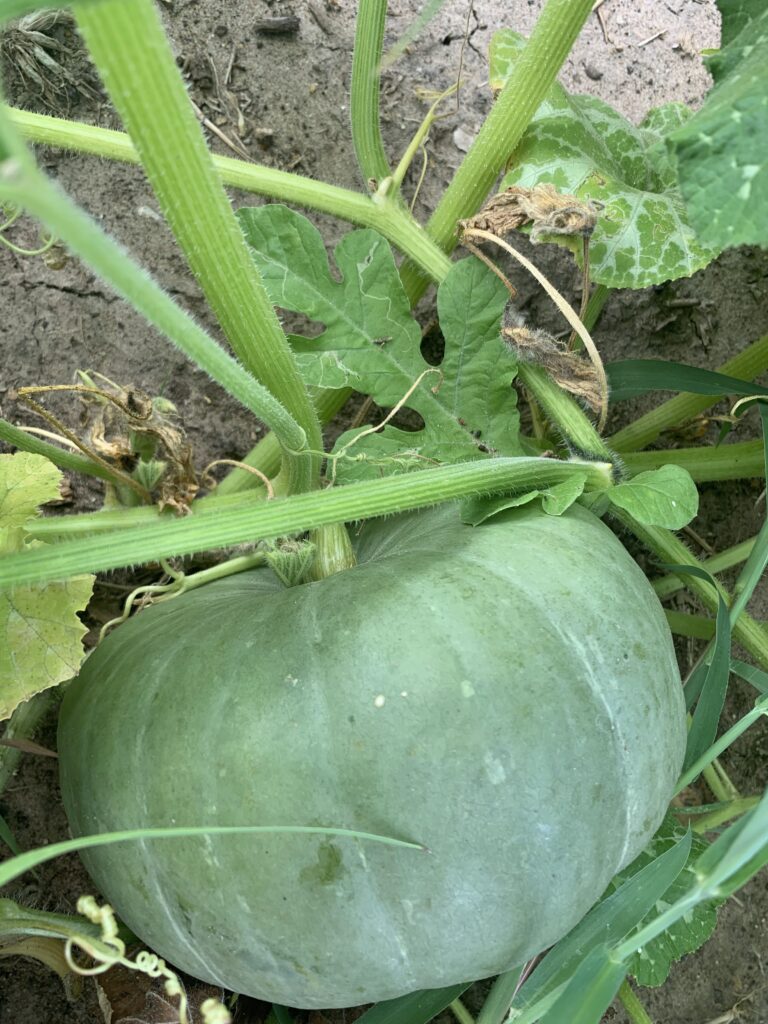
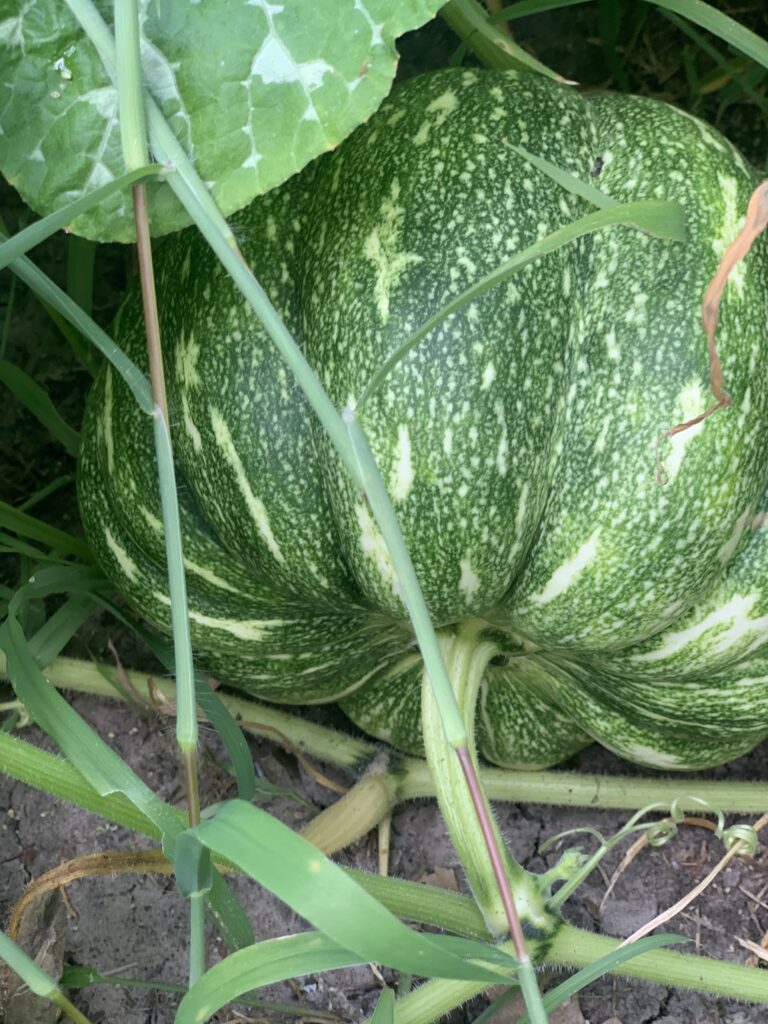
Pumpkin Growth Stages – Baby Pumpkins
About a month after transplanting, you will notice the green bulbs that were at the base of the female flower have turned into baby pumpkins. The pumpkin will continue to increase in size for weeks and the final size will depend on the variety of pumpkin planted. If you notice the pumpkin laying on it’s side you may attempt to set the pumpkin upright so that the pumpkin does not have a flat side. Take care when moving the baby pumpkins that you do not break the stem. If you have constantly moist soil you may want to elevate the pumpkin slightly on a board or object to prevent it from rotting.
Pumpkin Pest & Disease Control
Pumpkin plants are very susceptible to pests and fungal disease and great care must be taken to keep your pumpkin plants healthy. Squash bugs and cucumber beetles can plague your pumpkin plants. The best course of action is to always keep a clean garden; remove all vines from squash and cucumbers each year so the pests do not overwinter.
If you only have a few pumpkin plants, adult squash bugs and cucumber beetles can be picked off manually and disposed of. Spinosad can be sprayed on the plants in the late evening hours to kill any young nymph pests, however, it does not work on adults. Squash bugs lay eggs on the underside of pumpkin leaves so spray both sides of your pumpkin leaves with Spinosad until the point of run-off. If adult squash bugs and cucumber beetles are too numerous to manually remove you may have to resort to a non-organic insecticide as a last effort.
Pumpkins are very prone to powdery mildew and downy mildew. Always water pumpkin plants with soaker hoses or drip irrigation. Overhead watering with a tri-pod sprinkler will greatly increase your chances of disease. If you notice mildew on your pumpkin leaves you can spray weekly with Monterey Liqui-Cop or Monterey Complete Disease Control. The products will not cure your pumpkin plants, but can greatly slow down the mildew and hopefully keep it from spreading.
Final Pumpkin Growth Stage – Harvesting & Storing Pumpkins
Toward the end of the season, check the pumpkin patch to see if any leaves are shading the fruits too much. Too much shade will cause the pumpkins not to ripen. If necessary, prune a few leaves to help the pumpkins ripen. How do you know when pumpkins are ready to pick? The tell tale signs of pumpkins ready for harvest are withered browning vines, pumpkins that have ripened to their known color such a orange, white or blue, and the rind is firm and hard. Cut the pumpkin from the vine with pruning sheers leaving a stem of at least 2-4″ on the pumpkin. Be careful not to carry the pumpkin by the stem; the stem can break and shorten the storage life of the pumpkin.
Place the pumpkins in a dry sunny space for 10 – 14 days to fully cure ensuring the skin is firm so they will have the longest shelf life. I like to elevate the pumpkins on a pallet so they are not touching to ensure the curing process is a success. If a frost is expected, be sure to move the pumpkins indoors. Pumpkins store best in a cool, dry place and arrange them so they are not touching. Stored pumpkins can last at least 3 – 4 months if stored properly.
I hope this article helps to explain what pumpkins plants look like during the different pumpkin growth stages. Follow these tips and you can grow your own pumpkin patch. Pumpkins are an easy crop to grow and a very exciting crop to grow especially for children. Tell us in the comments what your favorite pumpkin variety is!

Ours did not do we’ll this year. Our bones went all over, then died. We got two small pumpkins from all of that.
It’s fun trying and seeing them grow, but I’m hoping for better yields next year.
Thanks for bringing this to the Homestead Blog Hop 411
I managed to grow my own pumpkins for Halloween this year. They weren’t massive or perfectly shaped but they were pumpkins! The vines did take over my garden a little but it was exciting to see them growing.